Shortly after most people start deep space astrophotography, they want to begin autoguiding.
This is especially true if you use a star tracker like the iOptron Sky Guider Pro or the Skywatcher Star Adventurer Pro.
There are many reasons for this which I will cover in this post. I will also discuss how to autoguide a Star Adventurer Pro.
Table of Contents
Autoguiding Star Adventurer
One of the main reasons you should consider autoguiding a Star Adventurer is that star trackers have high levels of periodic error compared to most “proper” equatorial mounts.
When I say proper equatorial mounts, I mean the ones that are motorized on both the right ascension and the declination axis.
Entry-level examples of these mounts are the iOptron CEM26 or the Skywatcher Heq5 Pro.
The fact of the matter is even though these star trackers are not cheap, they are considered a bare essential entry-level piece of equipment in the astrophotography world.
Unfortunately, quality control at this price point is minimal, and the tracking abilities will largely depend on how good your copy is.
Periodic error is basically the result of slight imperfections in the gears of the mount.
The way these trackers work is the right ascension axis has a main gear that meshes with a worm gear. As the worm turns, it rotates the gear that drives the RA.
Every mount will have some degree of periodic error, so this issue isn’t unique to star trackers.
Really high-end mounts will have a low degree of periodic error, but you are also paying a lot more money for the machining required to achieve this.
As I mentioned, some people get remarkable results with their star trackers right out of the box.
However, others have issues achieving round stars during exposure times that most would consider very reasonable.
I have the original version of the Star Adventurer Pro.
When I tested it at 300mm (the longest focal length I would recommend on a star tracker), I could keep about 60% of my 60-second sub-exposures.
Bear in mind that I eyeballed the polar alignment, albeit through a properly calibrated polar scope.
I think my copy is about par for the course, and what you should expect.
60 seconds is plenty of exposure time, don’t believe the misconception that your images will be terrible if you can’t achieve 2-minute sub-exposures.
However, you want to ideally keep all of those 60-second exposures rather than wasting precious imaging time under clear skies.
Autoguiding is also more or less mandatory for narrowband imaging unless you are using a very short focal length lens.
Advantages of Autoguiding:
- You get to keep more of your subs
- More precise control over dithering
- It is required for narrowband imaging
Using Narrowband filters or dual narrowband filters such as the Optolong L-enhance or L-extreme will require guiding.
This is because you need long exposures, typically around 3+ minutes, to capture the signal from Ha and Oiii.
I mentioned “more precise” control over dithering, which is only accurate for the Star Adventurer 2i (the newer model).
You can dither without guiding with the Star Adventurer 2i, but you cannot do this with the original Star Adventurer Pro.
Guide Scope Recommendations
Guide scopes are very much like primary imaging telescopes in the sense that most of them are copies of one another.
Therefore, generally speaking, you will not get better guiding performance by paying a ton of money for a guide scope.
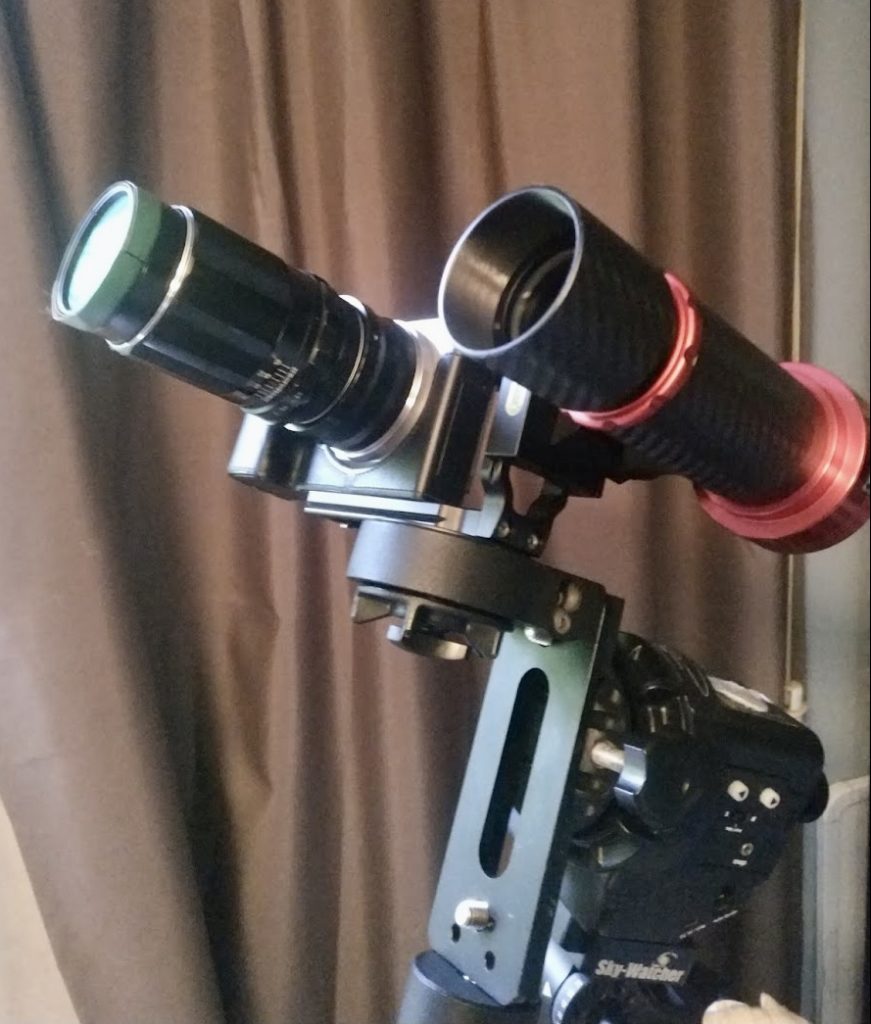
With a Star Adventurer, you need to minimize weight and consider a small guide scope. In this case, there are two that I would recommend.
The cheapest option and the one that I have for my Rokinon 135mm lens setup is the Svbony SV165.
This little guy is a 30mm guide scope that can be purchased on Amazon for about $55.
If for any reason this option is not available or out of stock, the name brand option to consider is the ZWO Mini Guide Scope.
This is virtually the same guide scope, the same aperture, and focal length. This one typically runs about $100.
Guide Camera Recommendations
If there is any chance that you may later dive into planetary astrophotography, the ZWO ASI 224mc is a special consideration.
It works great as a guide camera, and because it is a color camera, it doubles as a fantastic planetary cam.
These will set you back $200.
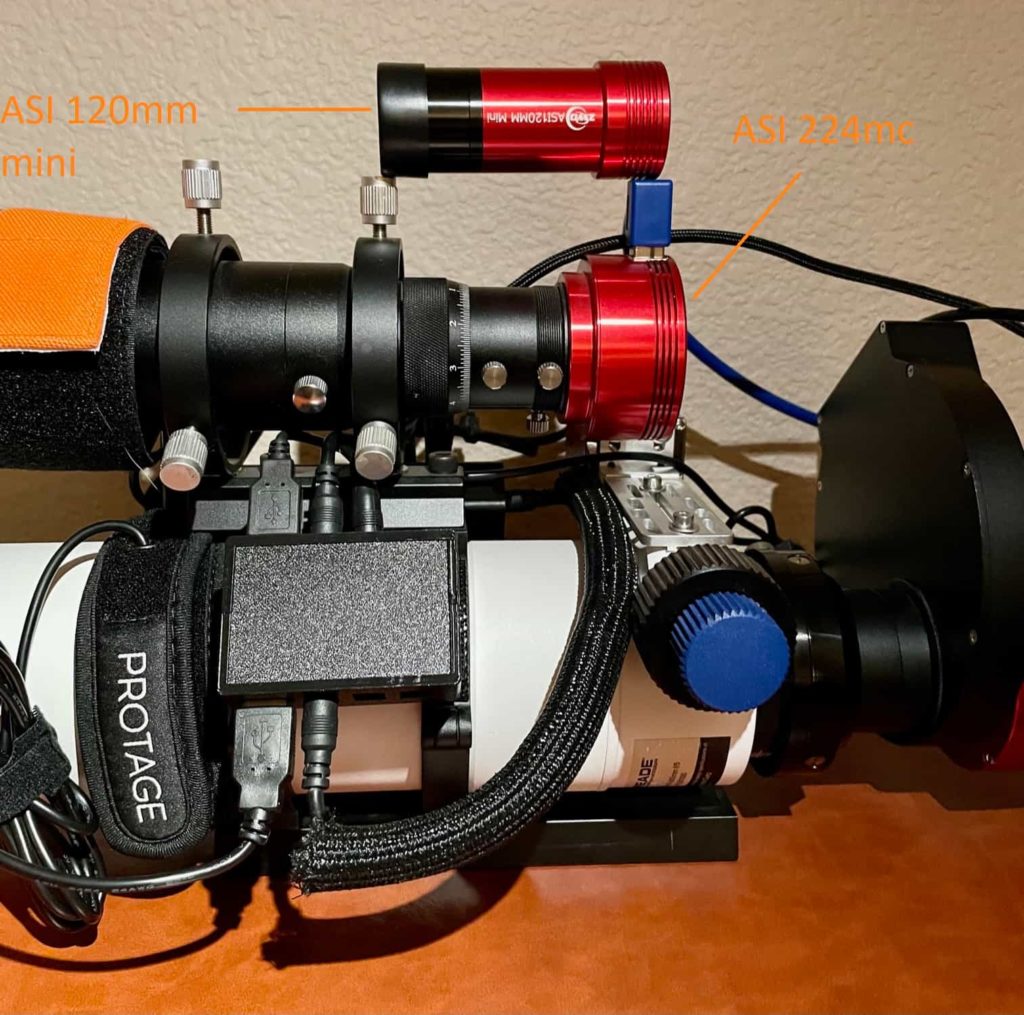
If you have no intentions of going near planetary astrophotography and want a guide camera workhorse, look at the ZWO ASI 120mm mini.
These are monochrome cameras which are said to be better for guiding than color cameras.
They are slimmer and weigh half that of the ASI 224mc.
I own both of these cameras; take a look at the size difference between them.
How to Guide with a DSLR
With a small refractor, you would typically mount the guide scope onto the tube rings and call it a day (an excellent reason to consider telescopes with tube rings vs. without).
That’s likely not an option with a star tracker since 300mm is about the maximum focal length you should attempt to use with one.
Most people using a star tracker do so with a camera lens rather than a telescope.
So how do you mount the guiding equipment?
The first thing that you will need is an Arca Swiss universal L bracket for DSLRs.
These can be found all over the place for reasonably cheap. You can even pick them up on Aliexpress for about $10 in some cases.
The next piece you’ll need is an Arca Swiss quick release clamp that will be mounted to the side of your L bracket to hold the guide scope.
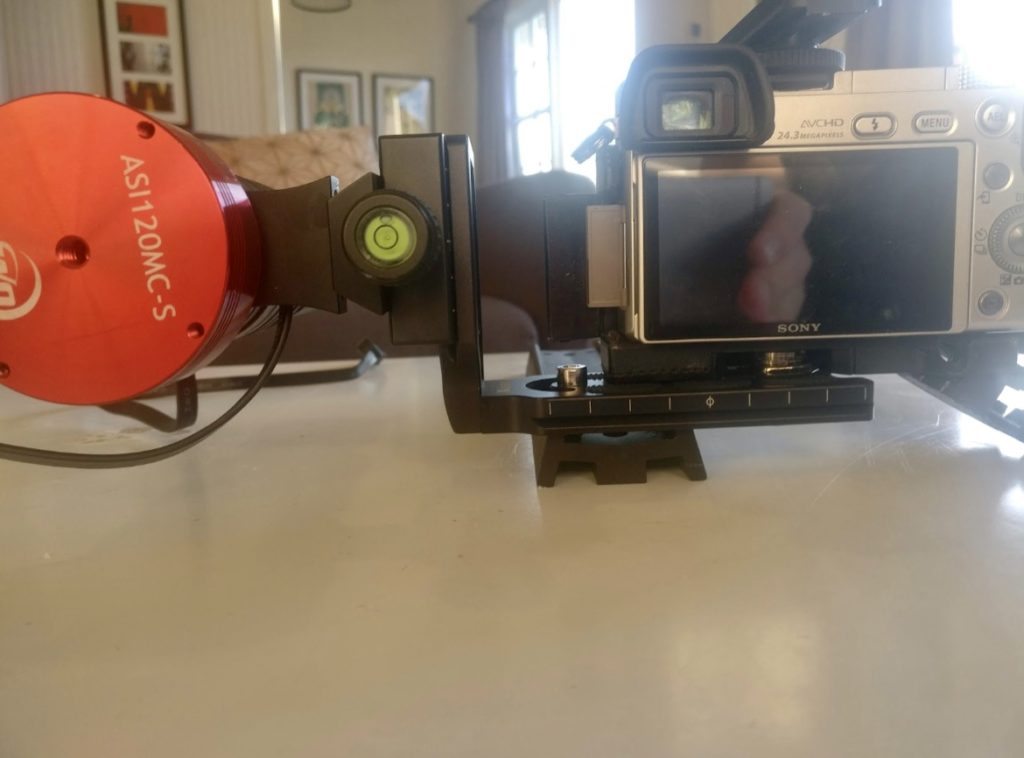
Here is an example of the one used in this photo.
If you are patient and don’t mind waiting, it can also be found on Aliexpress for half the price.
How To Connect to PHD2
When buying a star tracker, there are a few disadvantages to keep in mind:
- They are not motorized on the declination axis
- They do not have go-to capabilities for this reason
- They are not ASCOM compatible
I’m not mentioning this to dissuade you from buying a star tracker, but these noteworthy mentions change how you connect the equipment.
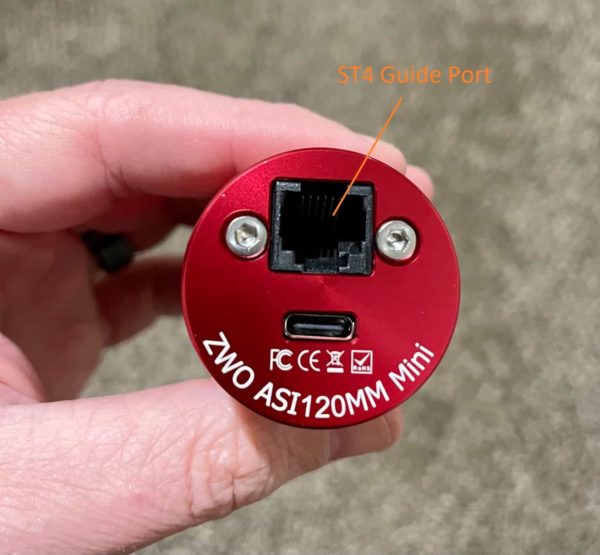
Instead of using pulse guiding, you will use the ST4 guiding method for star trackers.
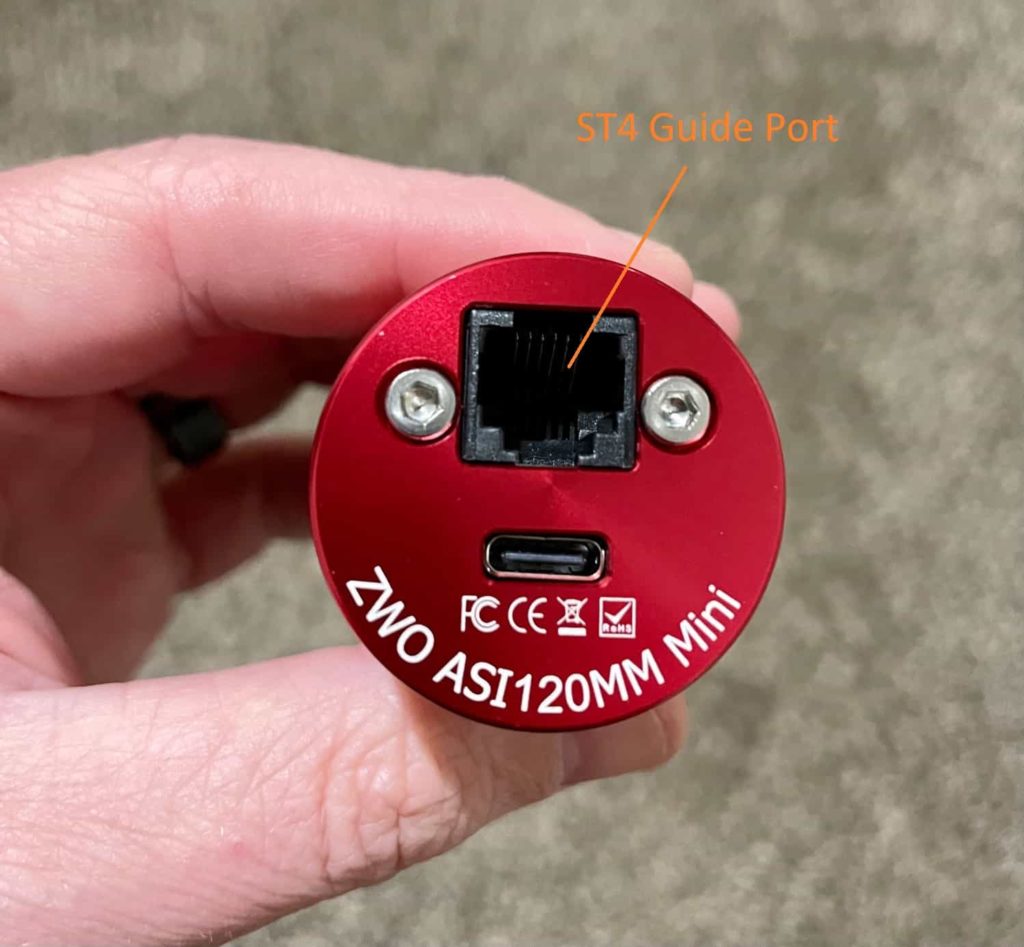
There are 2 cables involved when establishing a connection. First, an ST4 cord runs from the guide camera to the Star Adventurer, and then a USB cord is run from the guide camera to the PC.
Once this is connected correctly, you should be able to establish a connection with PHD2 to begin guiding.
It’s also worth noting that you should calibrate in PHD2 both before guiding and each time you change targets.
Conclusion
For the cost, autoguiding is the cheapest and most effective way to improve your astrophotography images.
The total cost for the equipment is around $250. You need to use less conventional ways of mounting the guide scope, but all that’s required is a couple of brackets.
Once everything is connected, an ST4 and USB cable will establish a connection with PHD2 guiding software.
1 thought on “Star Adventurer Autoguider”
Comments are closed.