You may have seen some of the incredible photos on the web or social media that amateurs are taking of the planets, the sun, the moon, or even deep space objects.
Most people that are interested in getting in to astrophotography have no idea where to start. If you are in that phase, then this post is for you.
There are many different types of astrophotography, and deciding which one is best for you depends on how far down the rabbit hole you want to go. In this post, I will talk about the different types of astrophotography and explain the differences between them.
Table of Contents
What is astrophotography?
The term refers to taking photos of astronomical objects, whether that be the sun, the moon, comets, planets, the milky way, or deep space objects.
But, of course, not all astrophotography is done the same way, and the equipment and techniques used vary depending on which type you choose to do.
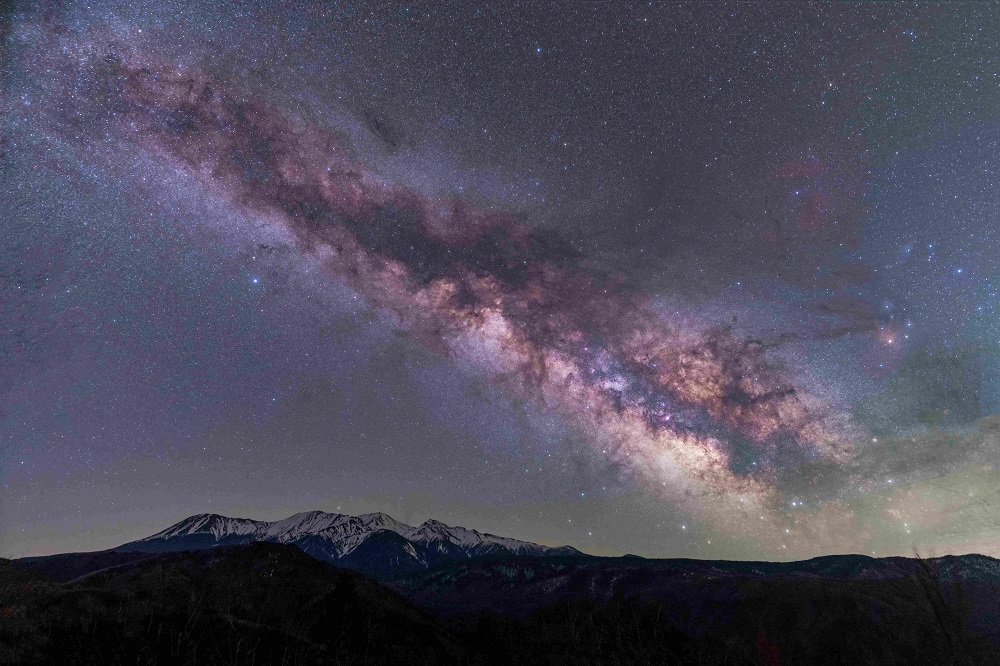
Landscape and Widefield astrophotography
When I say widefield, I am referring to the focal length of the lens that you use. This type of astrophotography is typically done with a camera lens as opposed to a telescope.
Widefield is a somewhat subjective term, but if you are taking photos of the Milky Way, you will want to use a relatively short lens. Short, in this case, would be in the ballpark of about 14mm.
If you want to get in to astrophotography, this type is the easiest to start with. Also, If you are into photography you may already own everything you need.
Since you are shooting very wide, you can expose your images for quite a long time before star trails become noticeable. At 14mm, we are talking over 20 seconds for each sub exposure.
Because we can take long sub-exposures without trailing, a star tracker is not mandatory for this type of astrophotography.
For best results, you’ll want to take many sub-exposures and stack them using software such as Deep Sky Stacker or Sequator.
Example Beginner set up– bold items are optional but recommended
- DSLR
- Fast wide-angle lens
- Tripod
- Intervalometer
- Bahtinov mask
Planetary Astrophotography
Planetary Astrophotography is very different from Milky Way or deep space astrophotography and is typically done using a telescope.
You would want to use a telescope with a long focal length and a large aperture. The most common telescopes used for planetary imaging are Newtonians and SCTs; while much more expensive, you could use a refractor.
There are a couple of key differences between planetary astrophotography and any other type, and the first has to do with light pollution.
If you live in a large city with heavy light pollution, you’re in luck because this has little to no effect on your ability to see the planets.
Because planets are so bright, you only need very short exposures to capture them. In fact, we are talking exposures so short that you are better off taking a video than you are individual exposures.
This type of astrophotography also uses what’s known as lucky imaging, referring to your seeing conditions. Because you are taking very short exposures, the turbulence of the earth’s atmosphere at that very millisecond will determine the quality of that frame.
You can collect thousands of photos and use computer software to stack only the best ones to make one final image by taking a video. A very popular piece of software used for this is Autostakkert.
When it comes to cameras, you have a couple of different options; you can either use a DSLR or a dedicated astronomy camera.
You are going to get much better results with an astronomy camera than you will with a DSLR. Astronomy cameras can serve a secondary purpose as a guide camera but aren’t nearly as versatile as a DSLR.
I mentioned Newtonian telescopes, and I think it’s a worthwhile mention that this can even be a Dobsonian telescope on the base that it comes with. You can actually hand track the planets to collect your images and then use a program called PIPP to stabilize the video before you stack it.
DSLRs work ok for this, but ideally, you will want a color astronomy camera such as a ZWO ASI 224mc.
You don’t need the cooled pro model astronomy cameras for this type of astrophotography. The exposures are so short that the chip will never heat up to the point of needing it.
Here is a great video showing exactly how to do what I just mentioned:
Example Beginner Setup
- 8 Inch Dobsonian Telescope
- DLSR or Astronomy Camera
- Barlow Lens
- Bahtinov Mask
- Imaging Laptop (if using an astronomy camera)
Deep space astrophotography
Deep space astrophotography is the end goal for many astrophotographers, and the way you go about achieving quality deep space images differs significantly from the others.
Seeing these types of photos on Reddit is what got me hooked on astrophotography. At first, I just couldn’t believe that they could be taken from here on earth, let alone by amateurs.
I’ve shown many of these photos to friends and family, and I think the biggest misconception is that they are taken with a single click of the camera’s shutter. Unfortunately, that couldn’t be farther from reality, and I will explain why.
Unlike planets within our solar system, deep space objects are often very faint and are sometimes millions of light-years away.
Our closest neighboring galaxy is the Andromeda galaxy which is 2.5 million light-years away.
To put this in perspective, the light captured in images you see of the Andromeda Galaxy has been traveling to earth since roughly the beginning of the stone age. Think about that for a second.
Because these objects are so incredibly far away, they often can’t be seen with the naked eye. They also can’t be captured with a single short exposure of a camera like planets can.
You need to take many long exposures called sub-exposures and stack them to produce your final image. The more total integration time you spend on DSOs, the better.
Total integration time refers to the total exposure time after adding up all of your sub-exposures.
Take my last image as an example, which is the cover photo for this website. That image of the Crescent Nebula was 18 hours of exposure time.
Taking long exposures introduces a lot of noise into your images, and the only way to improve the signal-to-noise ratio is by stacking many hours’ worth of images onto one another.
Because we are imaging over the course of many hours and taking long sub-exposures, we need a way to counteract the earth’s rotation.
We can achieve this by putting our equipment on an equatorial mount, tracking at the sidereal rate as we take our exposures.
For deep space astrophotography, you cannot use an alt-az mount. Alt-az mounts are those that sit on a horizontal base and only move up, down, left, and right. An example of this would be the tracking mounts for Nexstar telescopes.
Instead of a flat base, we need a wedge between the tripod and the mount head, set to our current altitude. This will allow us to align the mount’s polar axis to the North or South Celestial pole. This process is otherwise known as polar alignment.
If you tried to do long-exposure astrophotography on an alt-az mount, your images are going to suffer from field rotation. As the earth rotates, so does your target, and your camera needs to maintain the same perspective and angle on the target throughout the imaging session.
This is a great visual representation of how this works.
Example Beginner set up– bold items are optional but recommended
- DSLR
- Lens between 135 mm and 300 mm
- Star tracker (ideally a Star Adventurer Pro or Skyguider Pro)
- Sturdy tripod
- Intervalometer
- Bahtinov mask
- Red dot finder
- Imaging laptop
Lastly, the processing involved in deep space astrophotography is much more labor intensive and challenging than other types of astrophotography.
This is something that very few people talk about when newcomers ask how to get into deep space astrophotography.
Processing your data is often just as challenging, if not more challenging, than gathering it.
Along with your light frames, you need to take calibration frames, which usually consist of darks, bias, and flat frames. These calibration frames correct hot pixels, vignetting, and uneven gradients in the background of your image.
Once you have calibrated and stacked your light frames, a basic processing workflow consists of:
- Stretching your data
- Noise reduction
- Background extraction
- Background Neutralization
- Color calibration
- Star reduction
- Adjustments to color saturation and hues
The steps above are again a very basic outline of what a processing workflow might look like. It gets much more involved if you are processing and combining channels separately as you would with monochrome/narrowband imaging.
If you are thinking about getting into this field of astrophotography, experimenting with data processing is the best thing you can do for yourself before you even begin.
You’re probably wondering how you can process data before you even start imagining. Thankfully, many people in the community have been kind enough to donate their data for such a cause.
Pixinsight is the gold standard for astrophotography processing software, but unsurprisingly, it’s expensive.
You don’t need to use Pixinsight when you first start. You may already own some of the alternative options, and a lot of it is free or relatively cheap. This includes:
- Gimp
- Astro Pixel Processor
- Photoshop
- Star Tools
- Nebulosity
Conclusion
Astrophotography is a very broad term because there are many different astronomical objects that you can photograph.
Some forms of the hobby are more challenging than others, and the techniques used from one to another differ significantly.
Deep space astrophotography, in particular, has a tremendous learning curve. I often say it’s both the most challenging and most rewarding hobby that I have ever been involved in.
If you want to get into deep space astrophotography, you can master half of it before you even begin.
Learning the fundamentals of image processing and practicing on publicly available data will give you a considerable head start right out of the gate.
5 thoughts on “How to get into Astrophotography”
Comments are closed.